
Upgrade Your GoPro with Ease: A Step-by-Step Guide to Replacing the LCD Screen and Digitizer
, by Great Deal, 3 min reading time
, by Great Deal, 3 min reading time
Are you the proud owner of a GoPro Hero9 Black, Hero10 Black, or Hero11 Black? If so, you know how important it is to keep your action camera in top-notch condition. One of the most crucial components of your GoPro is the LCD screen and digitizer, which can be susceptible to wear and tear over time. But don't worry, with the right tools and a little bit of patience, you can easily replace these parts and breathe new life into your beloved camera.
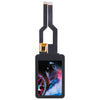
In this blog post, we'll take you through the step-by-step process of installing a brand-new Original LCD Screen and Digitizer Full Assembly for your GoPro. Whether you've experienced a cracked screen, a unresponsive touch panel, or just want to upgrade to a newer, more vibrant display, this guide will have you back in action in no time.
Before we dive in, make sure you have all the necessary supplies on hand. You'll need the following:
It's important to use genuine GoPro parts to ensure compatibility and optimal performance. Cheap knockoffs may seem like a bargain, but they can often cause more problems than they solve.
Begin by powering off your GoPro and removing the battery. This will ensure that no electrical current is running through the device during the replacement process. Next, use your Phillips screwdriver to carefully remove the back cover of the camera, exposing the internal components.
Gently use the tweezers to disconnect the ribbon cable that connects the LCD screen and digitizer to the main circuit board. Be very careful not to pull or tug on the cable, as this can damage the delicate connectors.
Carefully peel away the old LCD screen and digitizer assembly, taking note of how it was positioned within the camera body. This will help you properly align the new unit during installation.
Align the new LCD screen and digitizer assembly with the camera body, ensuring that it fits snugly in the designated area. Gently press down on the assembly to secure it in place, then reconnect the ribbon cable to the main circuit board.
Replace the back cover of the camera and secure it with the Phillips screws. Reinsert the battery and power on your GoPro. Test the new LCD screen and digitizer by navigating through the menus and ensuring that the touch panel is responsive.
And there you have it! With a few simple steps, you've successfully upgraded your GoPro's LCD screen and digitizer. Enjoy your newly refreshed action camera and capture all your adventures in crystal-clear detail.
Remember, if you encounter any issues or have additional questions, don't hesitate to reach out to the Great Deal team for support. We're always here to help you get the most out of your GoPro and keep your gear in top-notch condition.